This is Part-2 in series of NodeJS Interview Questions, we are trying to explore more intermediate to advanced level concepts related to NodeJS. If you landed to this NodeJS Tutorial directly, we will highly recommend to go through the previous part to understand the beginner level concepts about the technology first, otherwise you can continue reading with this NodeJS article and let us know about your feedback at the end in comments sections.
We have tried our best to explain all related topics/concepts in detail with the help of practical examples, NodeJS source code and screenshots/diagrams wherever required. This Node.js Tutorial will also be helpful for practically preparing an interview about NodeJS technology.
NodeJS Interview Questions – Part 2 PDF version will be available later for download.
Getting Started NodeJS Tutorial List
Following Node.js & Related Tutorials will be helpful to practically grasp the technology.
- NodeJS Interview Questions and Answers
- How to Install and Test If it’s Working Fine?
- AngularJS Vs ReactJS Vs BackboneJS Vs Ember
- Getting Started with AngularJS 2
Advanced NodeJS Interview Questions List
- Explain Event Loop Architecture of Node.js?
- How EventEmmiter Works?
- Explain Process Object in Node.js?
- Explain Cluster Server Object in Node.js?
- What is NodeJS Module? Explain various modules in Node.js? E.g. Request Module | Color Module etc.
- What are the followings in Node.js? Karma, Jasmine, Grunt
- How we can create HTTPS Server with Node.js?
- How to achieve Concurrency in Node.js?
- What is web scrapping?
- How to handle JSON files in Node.js?
Explain Event Loop Architecture of Node.js?
The applications are processed in a event-loop way using the following steps:
- When a request or task arrives, it is stored in a event queue.
- Event queue is then replicated with respective closure, where closure is an inner functions that includes corresponding event along with it’s callback. Event loop helps to run multiple number of event concurrently even though NodeJS Architecture still running in “single-threaded” fashion.
- Event Loop is a queue of callback functions.
- The event loop then sends the request to worker thread from a c++ Thread pool, handled by libuv library. All I/O request is performed asynchronously by the threads in the thread pool.
- Once the thread completes the corresponding I/O request, the associated callback is queued for processing.
- Event loop executes the callback and return the response.
![Event Loop Architecture]()
- Event loop itself if a single thread running in a single process. Therefore, when an event happen this can run without interruption.

How EventEmmiter Works?
Nodejs allow to create custom event using event module and eventemmiter class.
- Get the reference of EventEmitter class of events Module.
var events = require('events'); - Create an object of EventEmitter class by using the reference.
var phoneEvent = new events.EventEmitter();
- Subscribe to event.
var incomingcall = function ringBell()
{
  console.log('cring cring’);
}
var recievecall = function ringBell()
{
  console.log('receive call’);
}
var rejecetcall = function ringBell()
{
  console.log('reject call’);
}

phoneEvent.on('cring', incomingcall);
Here, ‘cring’ is the first event, which has register to ‘incomingcall’ listener function. It is possible to register same event to as many as possible functions. Such as:
phoneEvent. addListener('cring', incomingcall); phoneEvent.on('cring', recievecall); phoneEvent.on('cring', rejectcall); - Emit the event.
phoneEvent.emit('cring'); - It is possible to count number of listener to any event.
var countListener = require('events').EventEmitter.listenerCount (eventEmitter, 'cring'); console.log(countListener + " Listner(s) listening to cring'vent"); - Remove any listener.
phoneEvent.removeListener('cring', rejectcall);
Explain Process Object in Node.js?
‘Process’ object is a global object, always available to Node.js application, therefore, it need not be injected using requires. This object provides the functionality in order to get control of currently running processes. Some other feature of process object are as following:
- This object is an instance of EventEmitter.
Methods accessible from ‘process’ object:
| Method Name | Description |
| process.abort() | Abort the currently running process immediately. |
| process.arch | Returns the architecture of the currently running process. |
| process.argv | Returns an array of argument passed at the starting of the Nodejs process. |
| process.argv0 | Stores a read-only copy of the original value of argv[0] passed when Node.js starts. |
| process.channel | Refers the IPC channel. |
| process.chdir(directory) | Change the current working directory. |
| process.config | Returns the configuration. |
| process.connected | Return ‘true’ if the IPC channel is connected to the process. |
| process.cpuUsage([previousValue]) | Returns user and system CPU time usage of the current process. |
| process.cwd() | Returns the current working directory. |
| process.env | Returns an object defining the environment. |
| process.emitWarning(warning[, name][, ctor]) | Emit custom message. |
| process.execArgv | Returns the set of Node.js-specific command-line options passed when the Node.js process was launched. |
| process.execPath | Returns the absolute pathname of the executable that start the Node.js process. |
| process.exit([code]) | Instructs to exit current process with specified code. |
| process.exitCode | A number that define the code for exiting the process. |
| process.getegid() | Returns the corresponding id of the process. |
| process.geteuid() | Returns the corresponding user id of the process. |
| process.getgroups() | Returns an array of group id. |
| process.getuid() | Return the id of the user. |
| process.hrtime([time]) | returns the current high-resolution real time in a [seconds, nanoseconds] tuple Array. |
| process.initgroups(user, extra_group) | initializes the group access list those are enlisted in /etc/group file. |
| process.kill(pid[, signal]) | Send signal to the process identified by the pid, it may perform something other than killing the project. |
| process.mainModule | Invoke the original main module. |
| process.memoryUsage() | Return the memory used by the Nodejs process computed in bytes. |
| process.nextTick(callback[, …args]) | Adds the callback to the “next tick queue”. |
| process.pid | Return the pid of the process. |
| process.platform | Returns the information related to operating system platform. |
| process.release | Returns information related to current release. |
| process.send(message[, sendHandle[, options]][, callback]) | Communicates with parent process by sending message. |
| process.setegid(id) | sets the corresponding group identity of the process. |
| process.seteuid(id) | Sets the corresponding user identity of the process. |
| process.setgid(id) | Sets the group identity of the process. |
| process.setgroups(groups) | Sets the supplementary group IDs for the Node.js process. |
| process.setuid(id) | Sets the user identity of the process. |
| process.stderr | Returns a Writable stream. |
| process.stdin | Returns a Readable stream. |
| process.stdout | Returns a Writable stream. |
| process.title | Returns the current value of process. |
| process.umask([mask]) | Return file mode creating mask.. |
| process.uptime() | Returns a string number of second for while the nodejs process is running. |
| process.version | Returns a json object containing the version for Nodejs. |
| process.versions | Returns a json object containing the version for Nodejs and its dependencies. |
Explain Cluster Server Object in Node.js?
Usually, a single instance of Nodejs run in a single thread, however, to enable concurrency, it is required to launch a cluster of NodeJS process. This is way to create multiple process, however they all uses the same port. Usually Node.js application run locally on localhost:3000 port. One app runs on one server using single thread on a single process. Using cluster, if the app is running on a i7 having 8 core of processor, then server will be running using 3000 port.
Create an express app by following steps describes here.
- Create a folder called ‘helloworld’
- Open command prompt at the new folder and run ‘ng init’ this will create the package.json and add dependencies for express.
{ "name": "helloworld", "version": "1.0.0", "description": "", "main": "index.js", "scripts": { "test": "echo \"Error: no test specified\" && exit 1" }, "dependencies": { "express": "^4.10.6" }, "author": "", "license": "ISC" } - Run ‘npm install’. This will install express and required libraries in node_modules folder.
- Create a file called ‘index.js’ inside ‘helloworld’ folder.
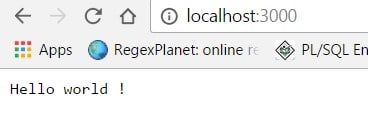
var express=require("express"); var app=express(); app.get('/',function(req,res){ res.end("Hello world !"); }); app.listen(3000,function(){ console.log("App is Running at PORT 3000"); }); - Run ‘node index’. This will start app
![Node.js Application]()
- From browser
![Node.js App Tutorial]()
- Install cluster with command ‘npm install cluster’
- Install os module ‘npm install os’.
- Create another file cluster.js.
var cluster = require('cluster');
var numCPUs = require('os').cpus().length;

if (cluster.isMaster) {

  for (var i = 0; i < numCPUs; i++) {
    cluster.fork();
  }

 cluster.on('online', function(worker) {
        console.log('Worker ' + worker.process.pid + ' is online');
    });

    cluster.on('exit', function(worker, code, signal) {
        console.log('Worker ' + worker.process.pid + ' died ');
        console.log('Starting a new worker');
        cluster.fork();
    });
} else {
    require("./index.js");
}

There are two types of process, if the process is Master, it is possible to copy the same process for number of CPU available in current machine. These copy processes are called worker process. If any process is not master, they are treated as normal NodeJS program.
Now if we change the index.js as following:
var express=require("express");
var app=express();
app.get('/',function(req,res){
 res.send('process ' + process.pid + ' says hello!').end();
});

app.listen(3000,function(){
   console.log('Process ' + process.pid + " is Running at PORT 3000");
});
Now if we run the cluster it will give us following output.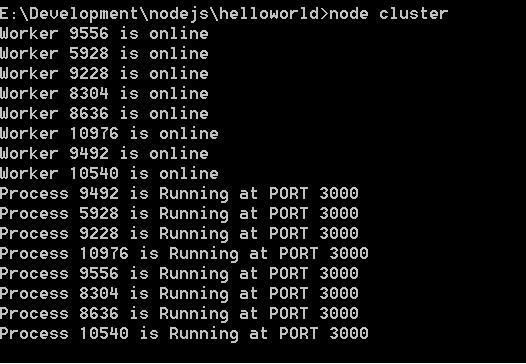
Therefore, if any given time 400 users hit /login endpoint, without clustering there would be one instance of server to process 400 login request. However, with clustering now for this example, there are 8 instance of the same program, therefore, each of them will serve 50 requests.
How it Works?
- Child/ worker process is created by triggering the child_process.fork() method. Each worker process can communicate to their parent process through IPC.
- Master process keep listening for incoming message from worker process. Usually it follows round robin scheduling to receive any incoming message among a number of worker process.
- Master process can also communicate directly to a particular worker process.
In this project-based course, you will build an entire Bookstore from scratch. You will be able to add, edit and delete books to the backend and customers will be able to browse, add and delete books from their cart as well as purchase it using Paypal.

What is NodeJS Module? Explain various modules in Node.js? E.g. Request Module | Color Module etc.
What is NodeJS Module?
Modules are developed by the community developers and published under NPM. There are a number of modules. As these modules are not Nodejs built in library, therefore, it is necessary to install these modules using npm install command.
npm install <moduleName>
- A set of codes and file of codes are packaged in a single package and thereby the package is called the module.
- Every module has its own scope, therefore, a number of modules running at the same time do not conflict with each other.
- Module can be installed using following command.
npm install <moduleName>
In order to install a module globally
npm install -g <moduleName>
- Modules can be given global access.
- Module can be updated using update command
npm update <moduleName>
- In order to use any module in Node.js project, it need to be imported as following:
var module1 = require(‘<moduleName>’);
module can also be imported from file
var module 2 = require(‘/home/username/modules/<modulename>’);
module can also be imported from folder
var module 3= require(‘./directoryName’);
- In order to publish any module, it is required to export the module as following:
export.Square=function(a) {
return Math.pow(a,2);
}
Node.js Color Module:
This is one of the very popular modules for Nodejs.
Install Color Module as:

Node.js Request Module:
- Install request module
‘npm install request’
- Declare variable in index.js.
‘var req= require(‘request’)’
- Use request module to create action.
request('http://www.yahoo.com', function (error, response, body) { if (!error && response.statusCode == 200) { console.log(body); } }) - Make a GET request.
request({ url: ‘https://randomuser.me/api/’, qs: {results: 10, time: +new Date()}, method: 'GET', headers: { 'Content-Type': 'application/json' } }, function(error, response, body){ if(error) { console.log(error); } else { console.log(response.statusCode, body); } }); - Make a POST request.
var req_options = {
  method: 'POST',
  uri: 'https://abc.com/login',
  body: {
    username: 'xyz',
    password: ’abc’
  },
  json: true
  }

request(req_options)
  .then(function (response) {
    // perform other operation
  })
  .catch(function (err) {
    // error handling
  })
More NodeJS Interview Questions and Answers
What are the followings in Node.js? Karma, Jasmine, Grunt
Karma in NodeJS:
Karma is a testing framework to run JavaScript test case using jasmine test framework.
Jasmine in NodeJS:
It is a behavior driven test framework for testing JavaScript code. This is independent from any other JavaScript module.
Grunt in NodeJS:
This is a command line tool to run task. Grunt has a number of library to deploy the front end code get ready for production.
Here are the steps for building application with Grunt:
Setup Karma and Jasmine to test:
- Install Karma by using the command.
npm install karma --save-dev
- Install jasmine plugins.
npm install karma-jasmine karma-chrome-launcher --save-dev
Alternative is to configure in package.json, adding karma and jasmine as devdependencies as following and run npm install to run all the dependencies.
"devDependencies": { "jasmine-core": "^2.2.0", "karma": "^0.12.31", "karma-chrome-launcher": "^0.1.7", "karma-jasmine": "^0.3.5" } - Install command line for karma.
npm install -g karma-cli
- Run karma from command line by typing ‘karma start’. Usually karma server will be launched at http://localhost:9876/
![NodeJS Karma Tutorial]()
Alternatively , using package.json and using configuration from karma.conf.js file.
"scripts": { "test": "karma start karma.conf.js" } - The next step is to config karma.
module.exports = function (config) {
  config.set({
    basePath: '',
    frameworks: ['jasmine'], // List of test frameworks. Typically, ['jasmine'], ['mocha'] or ['qunit']
    plugins: [
      require('karma-jasmine'),
      require('karma-chrome-launcher'),
      require('karma-remap-istanbul')
          ],
    files: [
      { pattern: './src/test.js', watched: false } //List of files/patterns to load in the browser.
    ],
    port: 9876,
    colors: true, //Enable or disable colors in the output (reporters and logs).
    logLevel: config.LOG_INFO,
    autoWatch: true, //Enable or disable executing the tests whenever one of  these files changes.
    browsers: ['Chrome'],
    singleRun: false
  });};

Using Grunt for Deployment:
- Install grunt-express plugin for express web-server tasks via Grunt.
npm install grunt-express-server --save-dev
- Create ‘Gruntfile.js’.
- It is possible to describe different server for deployment in Gruntfile.js.
grunt.initConfig({ express: { options: { }, dev: { options: { script: 'path/to/dev/server.js' } }, prod: { options: { script: 'path/to/prod/server.js', node_env: 'production' } }, test: { options: { script: 'path/to/test/server.js' } } } }); - Describe the options inside the options tag in Grunt config.
express: { options: { }, - Define the task and register.
grunt.registerTask('rebuild', ['clean', 'browserify:scripts', 'stylus', 'copy:images']); grunt.registerTask('dev', ['rebuild', 'express', 'watch']); - Now if we run express:dev it will start the server on dev environment
How we can create HTTPS Server with Node.js?
- Install connect module.
npm install connect
- Create a middleware module, to print the message send as the parameter of the request.
function printmessage(message){ return function(req, res){ res.end(message); }; } module.export = printmessage; - Create the server app.
var connect = require('connect'); var printmessage = require('./printmessage'); var app = connect.createserver( printmessage('Hello world!!!!') ); app.listen(8080); - Run the server with command ‘node index’
- From http://localhost:8080/ it will shows the message on the web page.
There are several ways to create HTTP request:
- Using HTTP Module
- Using Express App
Using HTTP Module:
- Install ‘http’ module.
npm install –save http
- Create a method for a ‘GET’ request.
var http = require('http'); function getrandomepeople (callback) { var req_options={ host: ' https://randomuser.me/, path: '/api?results=90' }; return http.get(req_options, function(response) { // Continuously update stream with data var data = ''; response.on('data', function(nd) { data += nd; }); response.on('end', function() { var jsonObject = JSON.parse(data); callback({ results: jsonObject.results, info: jsonObject.info }); }); }); }; - Create a method for POST request.
var http = require('http');

function PostData(callback) {
  // Build the post string from an object
  var data = <any Json object>

    var req_options = {
      host: 'https://randomuser.me/,
      port: '810',
      path: '/generate',
      method: 'POST',
      headers: {
          'Content-Type': 'application/json',
          'Content-Length': Buffer.byteLength(post_data)
      }
  };

  // Set up the request
  var post_request = http.request(req_options, function(response) {
      response.setEncoding('utf8');
      response.on('data', function (nd) {
          console.log('Response: ' + nd);
      });
  });

//write the data
  post_request.write(post_data);
  post_request.end();

}
Using Express App:
- Create a file called route.js.
module.exports = {
    '/alldb': {
        get: {
            controller: 'DBController',
            method: 'getAllDB',
            public: true
        }
    },
    '/database/:dbName/doc/:docId': {
        get: {
            controller: 'DBController',
            method: 'getDocument',
            public: true
        },
        put: {
            controller: 'DBController',
            method: 'persistDocument',
            public: true
        },
         'delete': {
            controller: 'DBController',
            method: 'deleteDocument',
            public: true
        }
    },
    '/search': {
        get: {
            controller: 'DBController',
            method: 'searchResult',
            public: true
        }
    }
};
This file will have the list of endpoints. - As each of the methods are described in a controller called DBController, therefore create a file called DBController.js.
/** * This controller exposes REST actions for managing Games. * * @version 1.0 */ 'use strict'; var async = require('async'); var DBService = require('../services/DBService'); var helper = require('../helpers/helper.js'); /** * List all Dbs. * @param {Object} req the request * @param {Object} res the response * @param {Function} next the next middleware */ function getAllDB(req, res, next) { async.waterfall([ function(cb) { DBService.dblist(cb); }, function(result) { res.json(helper.buildResponse(result)); }], function(err) { if (err) { return next(err); } }); } /** * List a documet * @param {Object} req the request * @param {Object} res the response * @param {Function} next the next middleware */ function getDocument(req, res, next) { var dbName = req.params.dbName; var docId = req.params.docId; async.waterfall([ function(cb) { DBService.getDoc(dbName,docId,cb); }, function(result) { res.json(helper.buildResponse(result)); }], function(err) { if (err) { return next(err); } }); } /** * save a documet * @param {Object} req the request * @param {Object} res the response * @param {Function} next the next middleware */ function persistDocument(req, res, next) { var dbName = req.params.dbName; var docId = req.params.docId; async.waterfall([ function(cb) { DBService.persistDocument(dbName,docId,cb); }, function(result) { res.json(helper.buildResponse(result)); }], function(err) { if (err) { return next(err); } }); } /** * delete a documet * @param {Object} req the request * @param {Object} res the response * @param {Function} next the next middleware */ function deleteDocument(req, res, next) { var dbName = req.params.dbName; var docId = req.params.docId; async.waterfall([ function(cb) { DBService.deleteDocument(dbName,docId,cb); }, function(result) { res.json(helper.buildResponse(result)); }], function(err) { if (err) { return next(err); } }); } module.exports = { getAllDB: getAllDB, getDocument: getDocument, persistDocument: persistDocument, deleteDocument: deleteDocument }; - Now from browser, if we call any endpoint defined on route.js and corresponding http request will be executed.
How to achieve Concurrency in Node.js?
Eventloop is a single thread running in single process. However there are several ways to achieve concurrency in Nodejs as following:
Asynchronous Programming:
- Developing application using Asynchronous Programming. async module is very helpful to perform this.
var async = require('async'); /** * List all Dbs. * @param {Object} req the request * @param {Object} res the response * @param {Function} next the next middleware */ function getAllDB(req, res, next) { async.waterfall([ function(cb) { DBService.dblist(cb); }, function(result) { res.json(helper.buildResponse(result)); }], function(err) { if (err) { return next(err); } }); } - An asynchronous function invokes a callback, here cb in the above example which is a function passed as the last argument, this function would be called as the next in the sequence in order to continue the program once the current one has been finished.
- The threadpool can provides a fixed number of thread. For large scale application where so many operations need to be executed concurrently, the thread pool should have larger number of threads and for small application it is ok if the thread pool has only few threads. It is important to define the number of thread in the thread pool in order to achieve concurrency.
- Although there is single thread, however multiple process will enable concurrency.
Launching Cluster:
By creating a small network of multiple processes those share main server ports; The details of clustering has been descried above NodeJS Cluster Server Object Interview Questions.
What is web scrapping?
Web scrapping is the technology to crawl web page and retrieve information from the wed page. The steps require to extract information using web scrapping are as following
- We load the page
- Parse the HTML result
- Extract the needed data
And the technologies those are required for web scrapping are as following
- NodeJS
- ExpressJS: A web framework.
- Request: make Http Request
- Cheerio: Implementation of core jQuery functionality for the server. This helps to get value for DOM element
- Install express
npm install express
- Install request
npm install request
- Install Cheerio
npm install cherrio
In index.js , load express, request and cheerio module
var express = require('express'); var request = require('request'); var cheerio = require('cheerio '); - Initialize express app
var app = express();
- Start server
app.listen(8080);
- Create an endpoint go through the IMDB web page or the movie ‘Moana’.
app.get('/scrapeweb', function(req, res){
    url = 'http://www.imdb.com/title/tt3521164/';
   request(url, function(error, response, html){
        if(!error){
            // load cherrio to parse the target html page
            var $ = cheerio.load(html);
            // read only the target DOM element
             var title, release, rating;
            var json = { title : "", release : "", rating : ""};
        }
    })
});
How to handle JSON files in Node.js?
These are the following step to handle json file:
Reading JSON File:
- Import fs module.
var fs =require('fs'); - Read file synchronously.
var jsoncontent = fs.readFileSync('profile.json'); - Parse the read content to json object.
var profile = JSON.parse(jsoncontent );
- Get any property of the json file.
console.log("user Name:", profile.username );
Writing JSON File:
fs.writeFile(‘profile.json’, JSON.stringify(profile, null, 4), function(err) {
    if(err) {
      console.log(err);
    } else {
      console.log("Profile is saved to profile.json");
    }
});
Alternatively, it is possible to read json file using require. File extension is optional for this command.
var profile = require('./profile’);

This Node.js Interview Questions Part-2 in series of Node.js Tutorial completes all important concepts related to this technology. We will come up with more related technology tutorials to elaborate other related web development concepts. If you feel something really important that is missing, you can contribute by adding your valuable suggestions in comments section.
Top Technical Interview Questions and Answers Series:
- Top 20 AngularJS Interview Questions
- Advanced Angualar2 Interview Questions
- Top 15 Bootstrap Interview Questions
- Top 10 HTML5 Interview Questions
- Top 10 ASP.NET MVC Interview Questions
- Top 10 ASP.NET Web API Interview Questions
- Top 10 ASP.NET Interview Questions
- Comprehensive Series of ASP.NET Interview Questions
- Top 10 ASP.NET AJAX Interview Questions
- Top 10 WCF Interview Questions
- Comprehensive Series of WCF Interview Questions
The post Must Have NodeJS Interview Questions – Part 2 appeared first on Web Development Tutorial.